Marine chronometers don’t like being moved around. This may seem to be a strange statement to make about instruments that spent their working lives on bridges of ships at sea, so it needs some explanation. When the balance wheel is oscillating back and forth it is unconnected with the rest of the chronometer for most of the time and it is only when it is releasing a tooth of the escape wheel or receiving a push (“impulse”) from it via the escapement that the two are connected. If the instrument is suddenly rotated at the wrong time, two teeth of the escape wheel may be released instead of one (“tripping”) or the impulse jewel may be struck amiss or the detent damaged (you can read in the book about how these parts work). The main message of this paragraph is that moving a chronometer around needs care. It is particularly vulnerable to damage if it is fully run down, so it should be moved when it is at least partially wound, as this keeps the escape wheel locked in the correct position. If it is to be transported it should be partially wound and the balance wedged unless it is going to make only a short trip in your hands or resting on your knees. When carrying it from one place to another move deliberately and avoid sudden rotational movements as, for example, when turning to close a door behind you.
How to wind a chronometer may seem to be a mystery. No key or keyhole is visible on the front, and on the back, there is a hole, but it seems to have a dead end. Let us start, however, with the key. A chronometer must not be wound clockwise (nor should the hands ever be turned backwards) so it is provided with a key called a tipsy key that will only allow anti-clockwise rotation Figure 1). If it is turned clockwise, a clutch should slip, so begin your acquaintance with the instrument by checking that this does indeed happen when you hold the stem of the key and turn the handle clockwise: sometimes the clutch mechanism gets clogged with dirt or rust.

Figure 1 : A Tipsy key.
Does the chronometer need to be wound? There is an indicator at the 12 o’clock position that shows how long the chronometer has run since being wound. Usually, fully wound is shown at zero on the right, but it varies a little from maker to maker. Figure 2 shows a fully down Russian MX6 chronometer.

Figure 2 ; Fully run down.
The key hole is on the back, so the gimbal lock has to be released (Figure 3) and the chronometer turned over sideways about the 12 to 6 o’clock axis (Figure 4). The key hole seems to have a blind ending, but if you rotate the cover clockwise, the winding stem will be revealed.
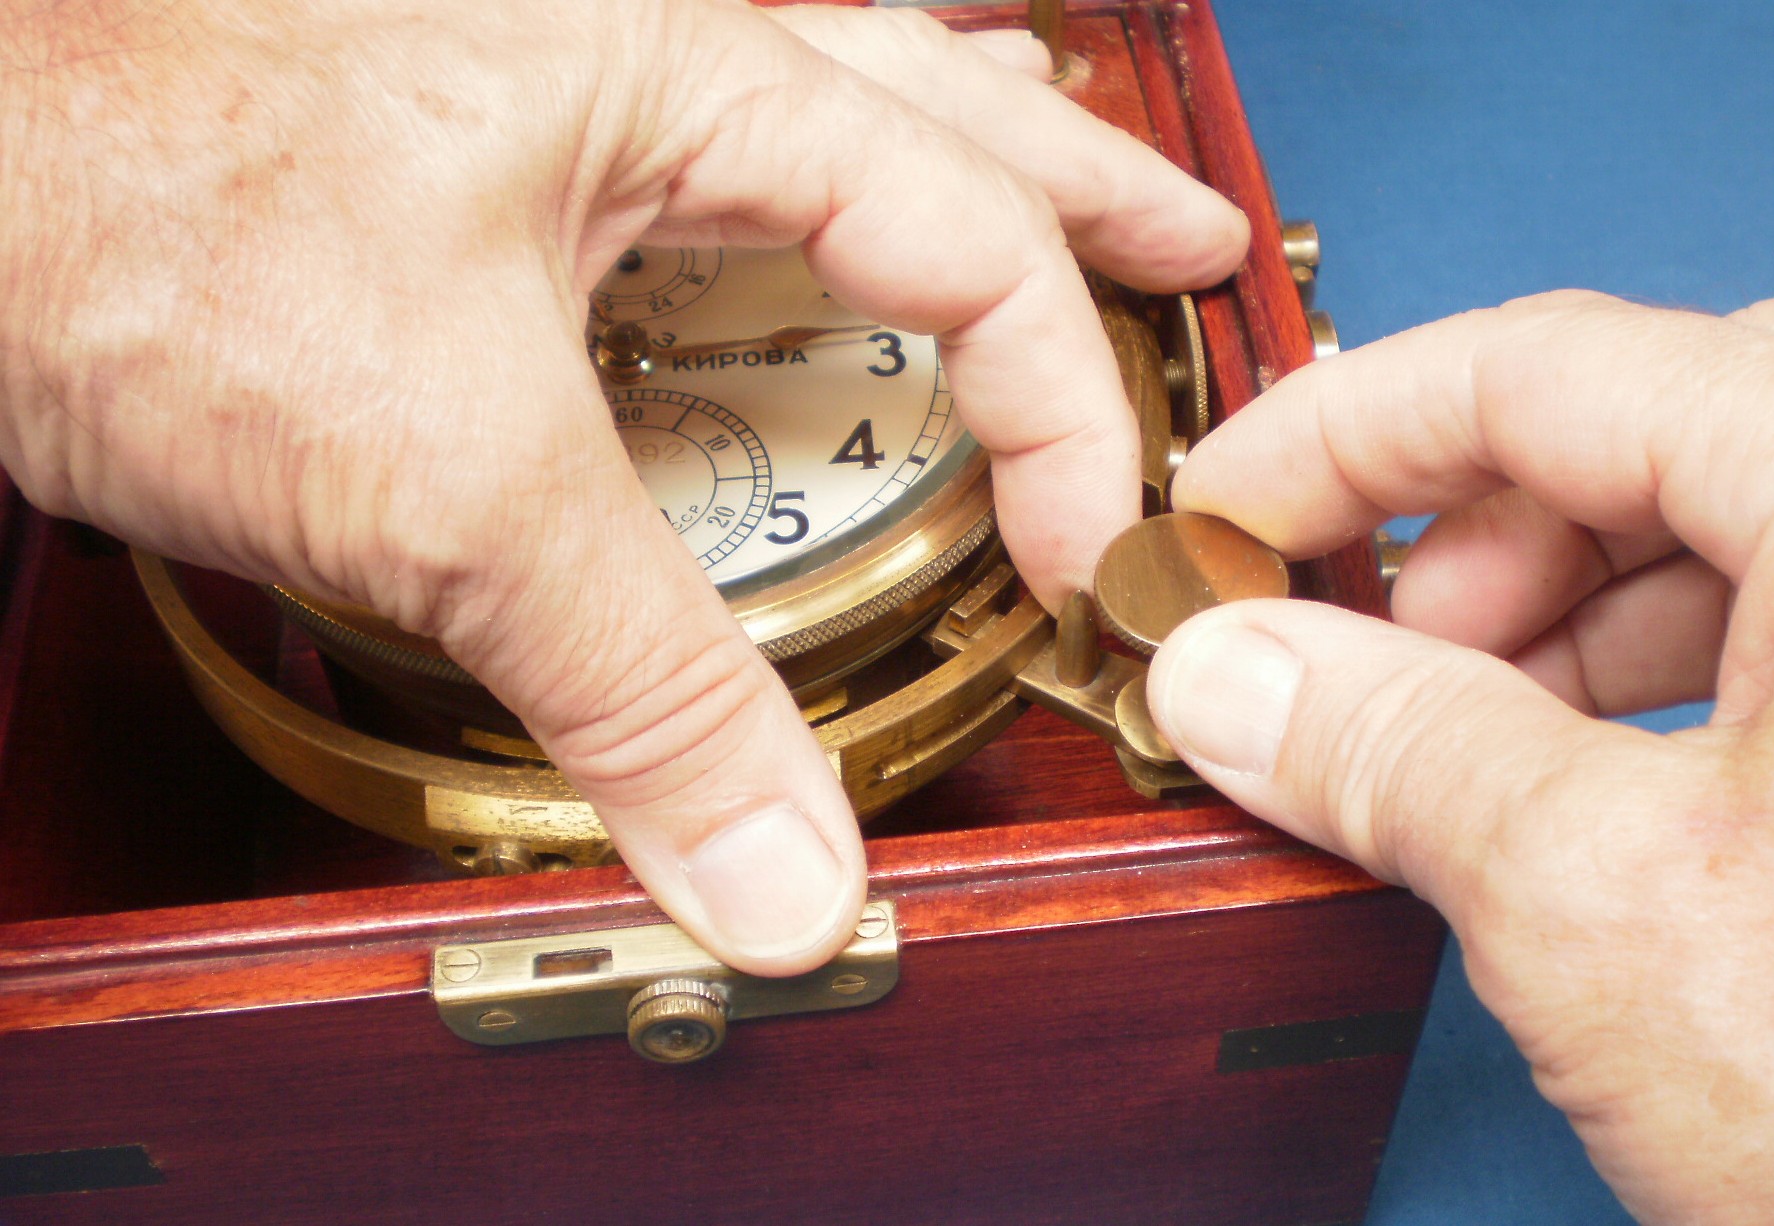
Figure 3 : Unlocking the gimbals.

Figure 4 : Dust cover and key hole revealed.
You now have to insert the tipsy key and wind it anti-clockwise slowly and steadily (Figure 5). To fully wind a 2- day chronometer, that is to say the vast majority, takes seventeen and a half half-turns. Twenty four hours run takes seven and a half half-turns and it is worth counting so that you don’t run hard up against the stop-work that prevents overwinding.

Figure 5 : Winding the chronometer
The winding indicator should then indicate zero (Figure 6). Remove the key and let the dust cover rotate backwards under the control of a finger, as chronometers don’t like sudden mechanical shocks any more than they like rotations.
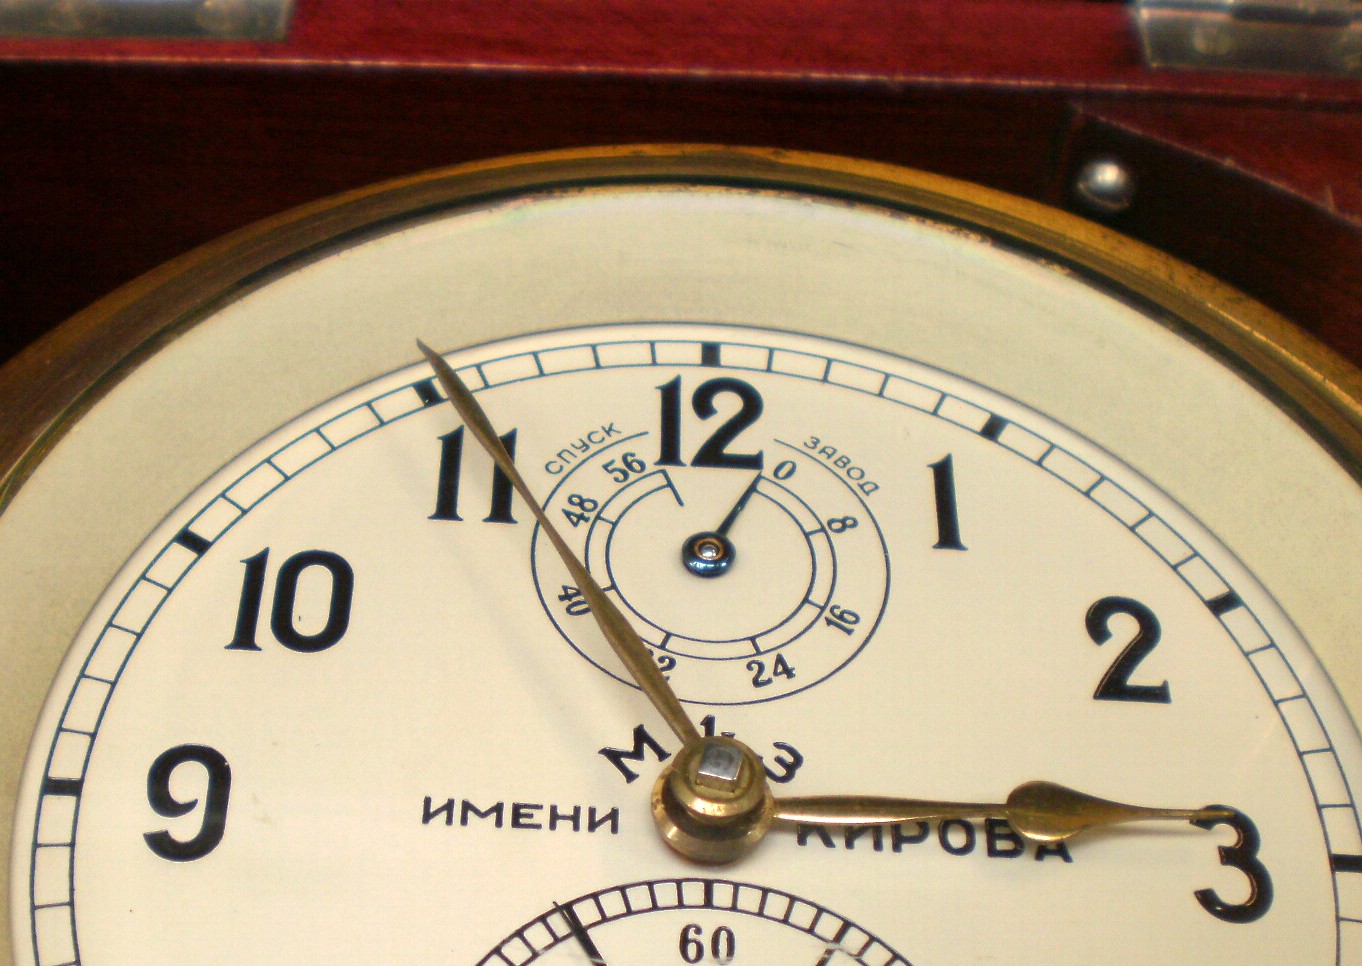
Figure 6 : Chronometer fully wound.
You can at this point return the instrument to a face up position, but do it handsomely, which is old sailor-speak for “carefully, gently.” Captain Lecky in his famous book “Wrinkles in Practical Navigation,” described how a sailor of his acquaintance returned the chronometer face up by rotating in end for end instead of side to side (Figure 7) and then had no idea how to get it facing the right way again. I leave this as an exercise for the reader…

Figure 7: Duh!
Once you have the instrument facing the right way, lock the gimbals and leave them locked at all times except when it is on board a vessel. To start the chronometer, rotate it sharply one way through about 30 degrees while face up. This should start it if it is in good order and the balance not corked.
A corked balance is unrelated to corked wine though the source of the cork may be a wine bottle. “In the beginning” describes how to open up the case and Figure 8 shows a cork wedge being inserted (or removed) from a balance.

Figure 8 ; Corking (or uncorking) a balance.
The unpractised or heavy handed are better steadying the balance with a fine artist’s camel hair brush rather than with a gloved hand as shown, but if you have a light and delicate touch and are confident that you will not shear off the balance pivots or disturb the timing weights, by all means use a gloved finger, bearing in mind that confidence is the feeling you get when you have failed fully to understand a complex matter. Note that the wedges go directly under the balance arms and are inserted just far enough to arrest movement without dropping out. When removing them, pull them straight out in line with the balance arms.
If you have wound the clock and uncorked the balance, you can use the artist’s brush to rotate the balance to see if it will start. You can also use it gently to stop the balance when necessary.


Recent Comments